My old gaming PC broke and was collecting dust. As a lifelong computer enthusiast, I decided to repurpose it with virtualization, turning it into a powerful, shared resource for my family and a way to reconnect with my passion for technology.
I aimed to split the PC’s processing power among several underpowered laptops in the house, machines designed for little more than light web browsing. Experimenting with VNC and Linux did more than just work; it rekindled my lifelong love for computers. This journey also ignited a new passion for cybersecurity, which has brought me to where I am today.
Eventually, I discovered I can use my GPU with a Windows or Linux virtual machine. Then, using an open source software called Moonlight and Sunshine, you could have very close to real-time gaming over even Wifi. Now I can share computers in my home private cloud with everyone in the family who wants to use them!
So if you have similar thoughts or needs and want to come along for the ride, I will teach you the process and point out some of the snags I faced.
Why not just install Windows?
- You don’t want to dedicate the machine to being only a gaming machine.
- Using Proxmox is just the beginning of our journey together. There are many tools that I will provide tutorials for setting up. A lot more geared toward security enthusiasts.
- The graphics card can be used (only one virtual machine at a time) with as many virtual machines as your PC can handle. This allows us to create a future Stable Diffusion and Ollama virtual machine!
Proxmox will be the blank canvas that is our journey through information technology and cybersecurity together, so let’s begin!
The first hurdle with Proxmox
The first issue that I run into when setting up Proxmox with a dedicated GPU. The machine gets stuck when using the standard booting options and the standard options need to be adjusted to avoid getting hung up.
I won’t explore all the possibilities of getting a working Proxmox install for your machine or setup. I do recommend BalenaETCHER. (https://etcher.balena.io/) Once you grab an .iso from the official Proxmox website (https://www.proxmox.com/), use your favorite .iso to USB tool or the one recommended above and make a bootable flash containing the Proxmox installation media. You will have to search online for how to boot from USB (also, make sure you can boot from USB, but most modern motherboards support this feature). It is usually the DEL, F2, or F12, but this varies by manufacturer.
This information was initially found at this website. https://www.oreilly.com/library/view/mastering-proxmox/9781788397605/9063c916-16f0-4c99-a139-3cc90c31d665.xhtml
So this will leave us at the screen shown below.
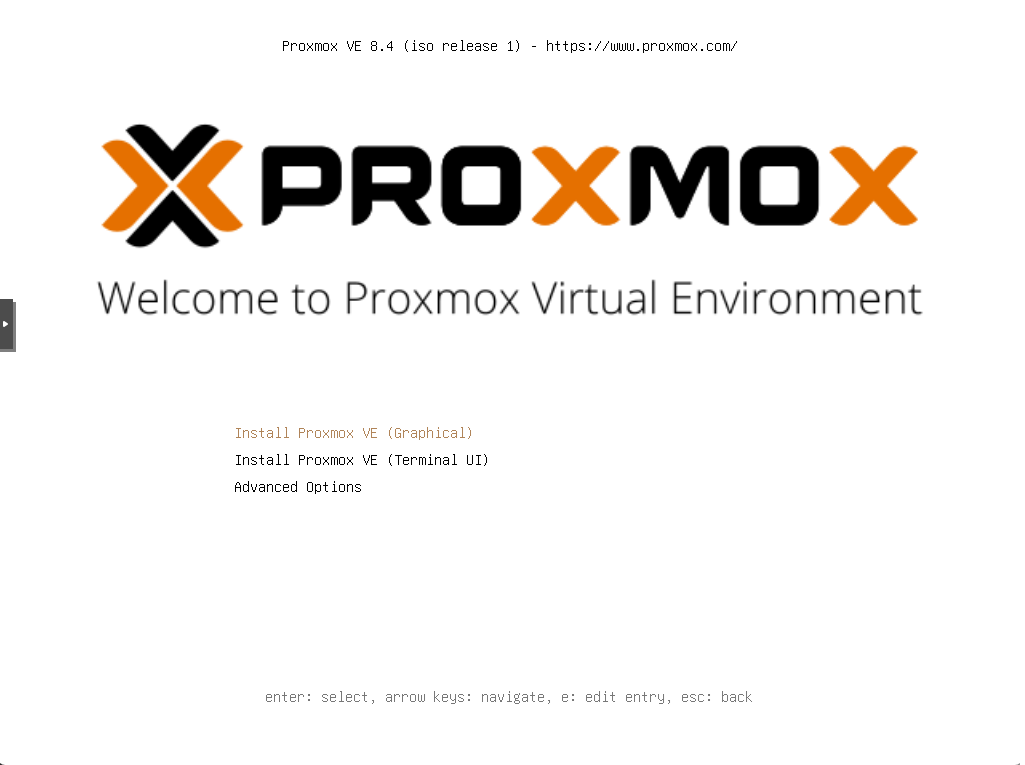
Let’s get past the first potential error. I would recommend just trying to hit enter on the first option and seeing if this works for you. Chances are that if you are using an Nvidia graphics processor then you will need to make a quick adjustment to the boot entry.
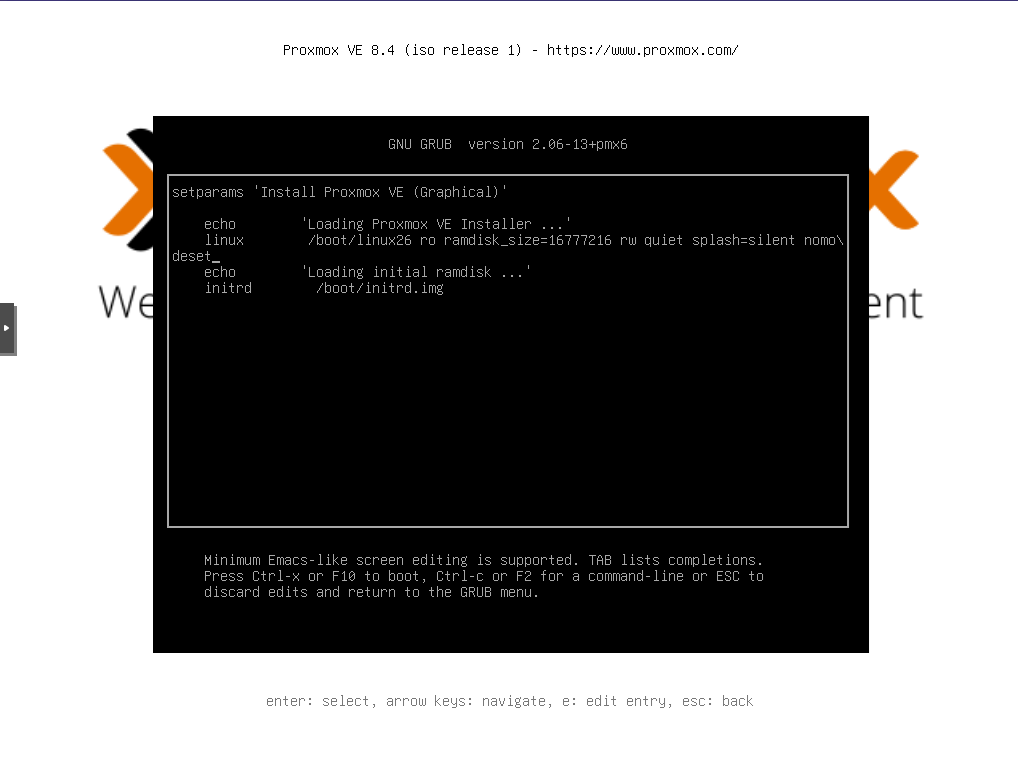
Hit the ‘e’ key to edit the entry and navigate to the very end of the line and enter the following:
nomodeset
Proxmox installation
Press F10 to boot with the provided options. You will have to read and agree to the end-user license agreement, and if so, move forward with the installation. Select your hard drive from the list provided. Once the Proxmox server is running, you can create as many virtual hard disks as you can fit on your physical hard disk.
Next, you’ll configure your location and time zone. The following screen prompts you for an administrator (root) password and an email address. The email address is used for system notifications, such as alerts about updates or hardware status, but it only functions if you configure a mail server later. For a standard installation, you won’t receive any emails from Proxmox.
Next, specify a hostname in the fully qualified domain name format (FQDN). I am currently using OPNsense for my router. When accessing the web user interface, I set a static IP address and have a DNS mapping to easily just add port 8006 to the end of the FQDN. The rest of the settings should be pretty familiar. Gateway would be the router, and in most cases, the DNS server would also be the router. Feel free to leave a comment down below if you have any questions!
After that, you should be able to click install and the system will automatically reboot once the installation is complete. I don’t believe you will need to set the nomodeset once you reboot. I have only had issues with it during the installation, but if you have a similar error and get stuck, make sure to add the nomodeset to the GRUB boot entry. This would be very familiar to how it was done during installation.
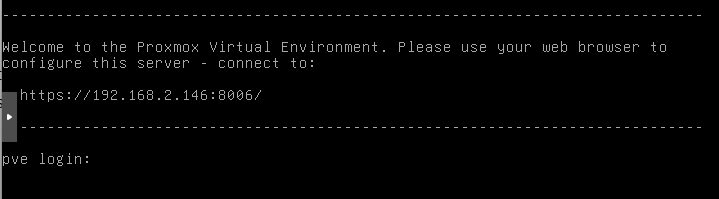
Navigate to the IP address shown (do not use the above picture; yours will most likely be different). We want to ensure things are working before we move on to the next step. Not having access via SSH or the web user interface can be extremely frustrating and will most likely result in reinstalling, as after this step, we will lose access to the monitor directly connected to Proxmox (As a side note, this monitor could be used as the screen for the gaming computer, but you will lose all view of Proxmox.)
GPU pass through (Where all the magic happens)
The first thing to check is that your processor supports and has enabled IOMMU, and that the GPU can be passed through. The best way to check would be to do an internet search of your processor or check your computer’s BIOS. Once you know if your CPU supports IOMMU. Log in to Proxmox and run the following command:
dmesg | grep -e DMAR -e IOMMU
If you are doing a clean install, I do not believe this will be enabled by default.
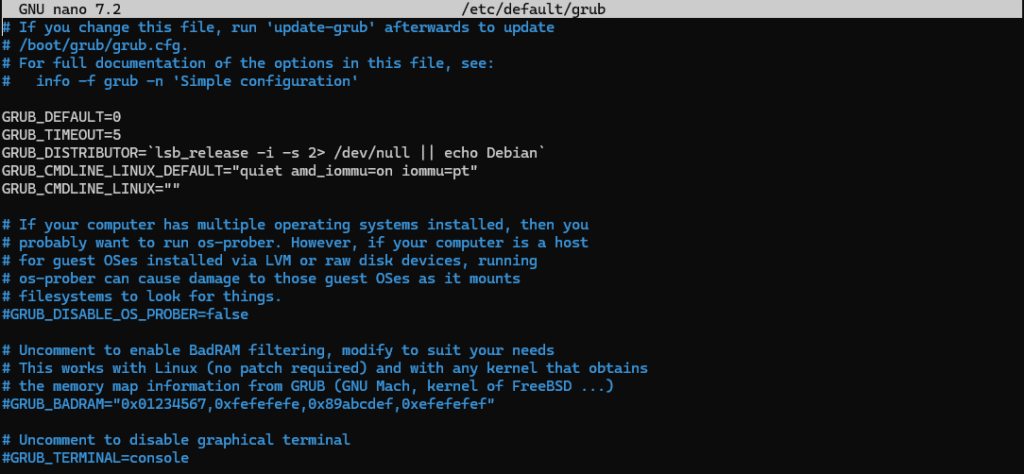
Use your favorite CLI text editor in Proxmox; in the example here, we will use nano. Run the following command:
nano /etc/default/grub
Depending on whether you have an Intel or AMD CPU, there are two different lines to add the correct options to the GRUB_CMDLINE_LINUX_DEFAULT line.
AMD:
amd_iommu=on iommu=pt
Example:
GRUB_CMDLINE_LINUX_DEFAULT="quiet amd_iommu=on iommu=pt"
Intel:
intel_iommu=on iommu=pt
Example:
GRUB_CMDLINE_LINUX_DEFAULT="quiet intel_iommu=on iommu=pt"
Next, you will make sure to save the changes and then update the grub configuration and then reboot the computer:
update-grub && reboot
Next let’s just verify that everything looks okay.
dmesg | grep -e DMAR -e IOMMU
This is an example output from my machine. We want to make sure we see something similar to this.
[ 0.770481] pci 0000:00:00.2: AMD-Vi: IOMMU performance counters supported
[ 0.774069] perf/amd_iommu: Detected AMD IOMMU #0 (2 banks, 4 counters/bank).

For a successful passthrough, your GPU and its related functions (like its HDMI audio controller) should ideally be isolated in their own IOMMU group. If other critical system devices are in the same group, you cannot pass the GPU through without passing those devices, which can cause instability.
Most modern systems handle this correctly, but it’s essential to verify. You can use the following shell script in the Proxmox terminal to list all IOMMU groups and the devices within them.
for group in /sys/kernel/iommu_groups/*; do
echo "=======================================" echo "IOMMU Group $(basename $group):" echo "---------------------------------------" for device in $group/devices/*; do lspci -nns $(basename $device)
done
echo "" # Blank line for spacing
done
Review the output and find the group containing your GPU. Ensure that everything in that group is something you want to pass through. This guide will proceed assuming your GPU is properly isolated in its own group.
Let’s go ahead and block this driver! We are going to create a file for the blocklist. If you are running with multiple GPUs, this will block that entire GPU driver for every GPU, so just keep that in mind. We will use nano again to edit/create this file:
nano /etc/modprobe.d/blacklist-gpu.conf
Now add the following for NVIDIA GPUs:
blacklist nouveau
blacklist nvidia
blacklist nvidia_uvm
blacklist nvidia_drm
blacklist nvidia_modeset
I have not been able to test this with an AMD GPU but you would want to block these drivers:
blacklist radeon
blacklist amdgpu
If anyone is able to verify that this works, I will edit this post to reflect your findings.
Update initramfs and reboot:
update-initramfs -u -k all && reboot
Once everything boots up and with any luck you have no errors, lets run a check to see if the drivers are bound to our GPU:
lspci -k -nn | grep -A 2 -E "NVIDIA|AMD|VGA"
You can remove the AMD and VGA portions along with the pipe if you are using NVIDIA, or just search through your driver’s output. We want to see vfio-pci as the “kernel driver in use.”

We have a GPU that we can attach to any virtual machine we would like. Remember that this can only be done on one virtual machine at a time.
The OS: The fun part
Nowadays, we have options for gaming computers. I would recommend Ubuntu and Steam if you want to have multiple machines without running into license issues. I am using a few Windows licenses. I have succeeded with both operating systems, and getting the drivers installed for AMD and Nvidia GPUs is pretty straightforward. If you are having issues, plenty of tutorials have been made for this. For a quick way to install, you can use this line:
sudo ubuntu-drivers autoinstall
Once we have a working virtual machine installed, updated and drivers installed we can begin the next step.
Moonlight and Sunshine
I have tried a lot of ways to get close to real time GPU accelerated graphics to another computer and each trial has it’s downsides. I have not found a flaw for this specific use with Moonlight and Sunshine.
Moonlight is a client that allows you to connect to GeForce Experience (which I believe has been discontinued) and Sunshine (what the community has replaced GeForce Experience with).
Moonlight is going to be installed on any computer that you want to be able to have access to the gaming machine. We will install Sunshine on the gaming machine.
Here is a link to the Moonlight GitHub (did I forget to mention they are both open source) – https://github.com/moonlight-stream/moonlight-qt/releases
Next, we will install the Sunshine server on the gaming PC. I will list direct links to the download from the Sunshine GitHub (also open source)
Ubuntu – https://docs.lizardbyte.dev/projects/sunshine/latest/md_docs_2getting__started.html#debianubuntu
I have listed these two since they have been directly mentioned in the tutorial, but if you click either link and look on the right side there are other operating systems that Sunshine is supported on in case your chose different operating system
Once you have both installed, you must “pair” each user on your computers to the server. This is accomplished through the web user interface on the Sunshine computer. This is easily accessed by going to the Sunshine icon, which will be in the lower right corner on Windows, and on Ubuntu, this will be in the upper right corner. Click on the icon and go to the PIN. The other device will be showing a PIN, and it’s as simple as putting that PIN in, and then that computer will have full access.

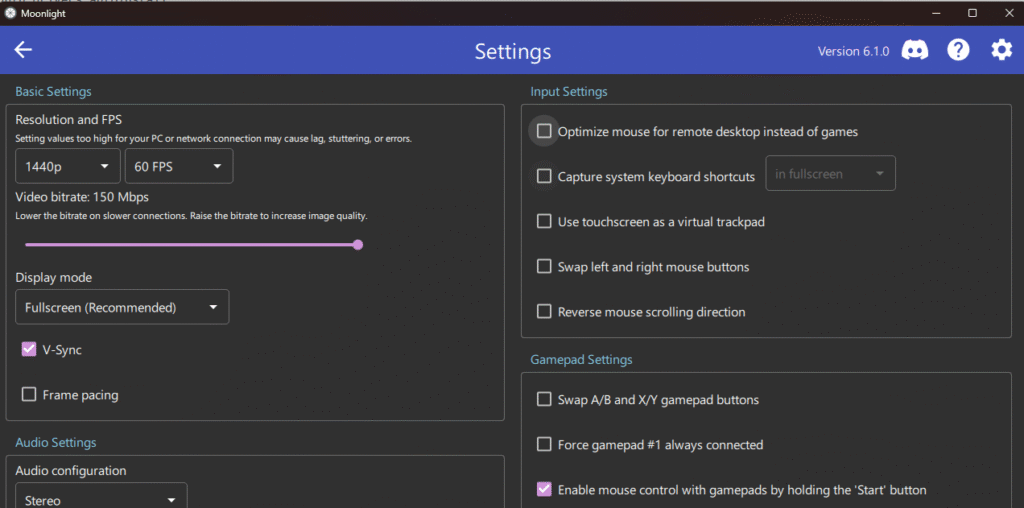
I would recommend going into your settings on the computer running Moonlight and changing resolution and FPS. My network supports high resolution and 60 FPS, which is what I run. To make these changes click the cog from the Moonlight interface and adjustments can be made in the upper left of the properties window.
What’s left?
Install all of your games. Have a bunch of fun!
I recommend making icons for the Moonlight start screen after you click the computer. I like this because it makes it feel less like a separate computer and more like you are just running the games on the computer you are currently using.

If you would like to do this with your games, it does take some extra work, but I believe the payoff is worth it.
Go to the settings for Sunlight on the game server and click on applications. Here is where you can add all the settings. You must find the Steam URL protocol ID if you are using Steam. This can be found through Steam by clicking on the game and going to the properties. On the pop-up window, go to updates; you will see the ID on this page.
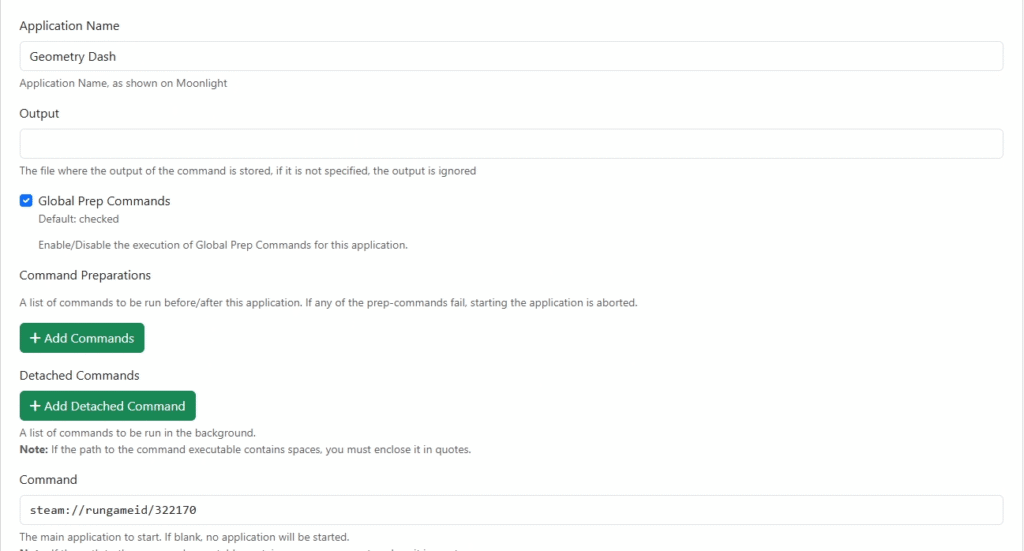
As can see from the picture above the command will be:
steam://rungameid/######
You can even use the user interface to find a good image to use for the option on the Moonlight game selection screen!
The security angle
Keeping all of your gaming, especially when kids have access to the computer on a virtual machine, gives you some potent security properties.
- Snapshots, snapshots, snapshots – You can use snapshots to make it so that if you ever feel the machine may have been compromised, you can roll back to a known safe snapshot
- A safe place to test games away from your main computer
- If things do go bad, just delete
- Easily isolated through VLAN (Proxmox supports this)
- Centralized control over the computer your child has access to – Make the Moonlight computer Linux with very few privileges and only allow them to connect to the Sunlight computer
Let me know what you think!
You now have a powerful, flexible virtualization server with GPU capabilities. This platform is the perfect foundation for a secure homelab, allowing you to isolate gaming, research, and network services. What will you build next? Let me know in the comments!
I hope that you and all of those you share this with get great benefit and you are able to share your love of technology and video games with those around you.
Make sure to bookmark my page for all the future fun! – https://securiysharp.io
Thanks all, SecuritySharp.io
Pingback: Violated and Vulnerable: How to Fight Back After Your Identity Is Stolen. Stop them in their tracks! - SecuritySharp.io